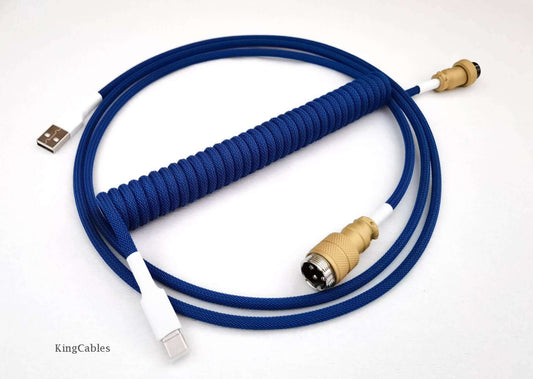
Coiled keyboard USB cables are not only functional but also add a touch of retro charm to your mechanical keyboard setup. While you can purchase pre-made coiled cables, making your own allows for customization and personalization. In this step-by-step guide, we’ll walk you through the process of creating your own coiled keyboard USB cable.
Materials Needed
Before you begin, gather the following materials:
- USB cable (preferably with a detachable end)
- Heat shrink tubing
- Heat gun or hairdryer
- Wire strippers
- Soldering iron and solder
- Coiling rod (such as a pen or pencil)
- Heat-resistant gloves (optional)
Prepare the Cable
Start by cutting your USB cable to the desired length. If your cable has a detachable end, remove it to make the coiling process easier. Use wire strippers to expose the wires inside the cable, being careful not to damage them.
Create the Coils
Wrap the exposed wires around a coiling rod, such as a pen or pencil, to create tight coils along the length of the cable. Keep the coils evenly spaced for a uniform look. You can adjust the tightness of the coils to achieve the desired level of springiness.
Secure the Coils
Once you’ve created the coils, use heat shrink tubing to secure them in place. Cut the tubing into small pieces and slide them over each coil. Use a heat gun or hairdryer to shrink the tubing, applying heat evenly to ensure a tight seal around the coils. Be careful not to overheat the tubing or the cable.
Solder the Connections
If your cable has a detachable end, solder the wires back onto the connector, ensuring the correct polarity. If you’re comfortable with soldering, you can also customize the connector by adding heat shrink tubing or decorative accents.
Test the Cable
Before using your coiled keyboard USB cable, test it to ensure that the connections are secure and that there are no shorts or breaks in the wiring. Plug the cable into your keyboard and computer and check for proper functionality.
Finishing Touches
Once you’re satisfied with the functionality of your coiled cable, you can add any additional finishing touches, such as decorative heat shrink tubing or custom labels. Use heat shrink tubing to cover any exposed wires or connections for added durability and protection.
Conclusion
Creating your own coiled keyboard USB cable is a fun and rewarding DIY project that allows you to customize your keyboard setup to your liking. By following these step-by-step instructions and gathering the necessary materials, you can create a unique and stylish cable that adds personality to your mechanical keyboard. So roll up your sleeves, grab your tools, and get ready to coil your way to keyboard perfection!